We just finished an overhaul of our tween boy’s bedroom, taking it from hodge-podge to rustic-modern-almost-teenager-friendly.
You can see the whole makeover here.
This is a fairly new house - just two years old - and we’re still trying to make it look warm and homey. The thing about newer homes is that the open concept - which makes things feel bigger and open and airy - can also feel cold and sterile.
To warm up my son’s bedroom without making it feel small and dark, we installed a shiplap wall, and it was so, so easy.

Here’s how to install a shiplap wall
Note: this post contains affiliate links. This means that I will make a small commission - at no additional cost to you - if you make a purchase using my links. Thanks for supporting my blog!
I made you an easy-to-follow printable with step by step instructions and a shopping list! Click the yellow button to grab yours - it’s my treat to you!
Materials
Shiplap (see below for information on different types)
Tape measure
Panel screws (or panel nails)
Drill (or nail gun)
Stud finder
Chalk line
Ladder
Wood putty
Stain
If you are working around a light switch, you’ll also need:
Bandsaw
6x32x2” screws
Possibly a new switch plate, if you want to update yours, like I did
Small hacksaw
Flathead screwdriver
Decide on your shiplap
You have lots of options here, a few of them being: you can cut your own slats from a piece of wood; use unfinished boards; or use something called “shadow gap.”
Shadow gap boards have been planed at the edges to create “controlled spacing.” In other words, you don’t have to use spacers between the boards to get that true shiplap look. You simply butt-up the boards against each other and the gap is already there.
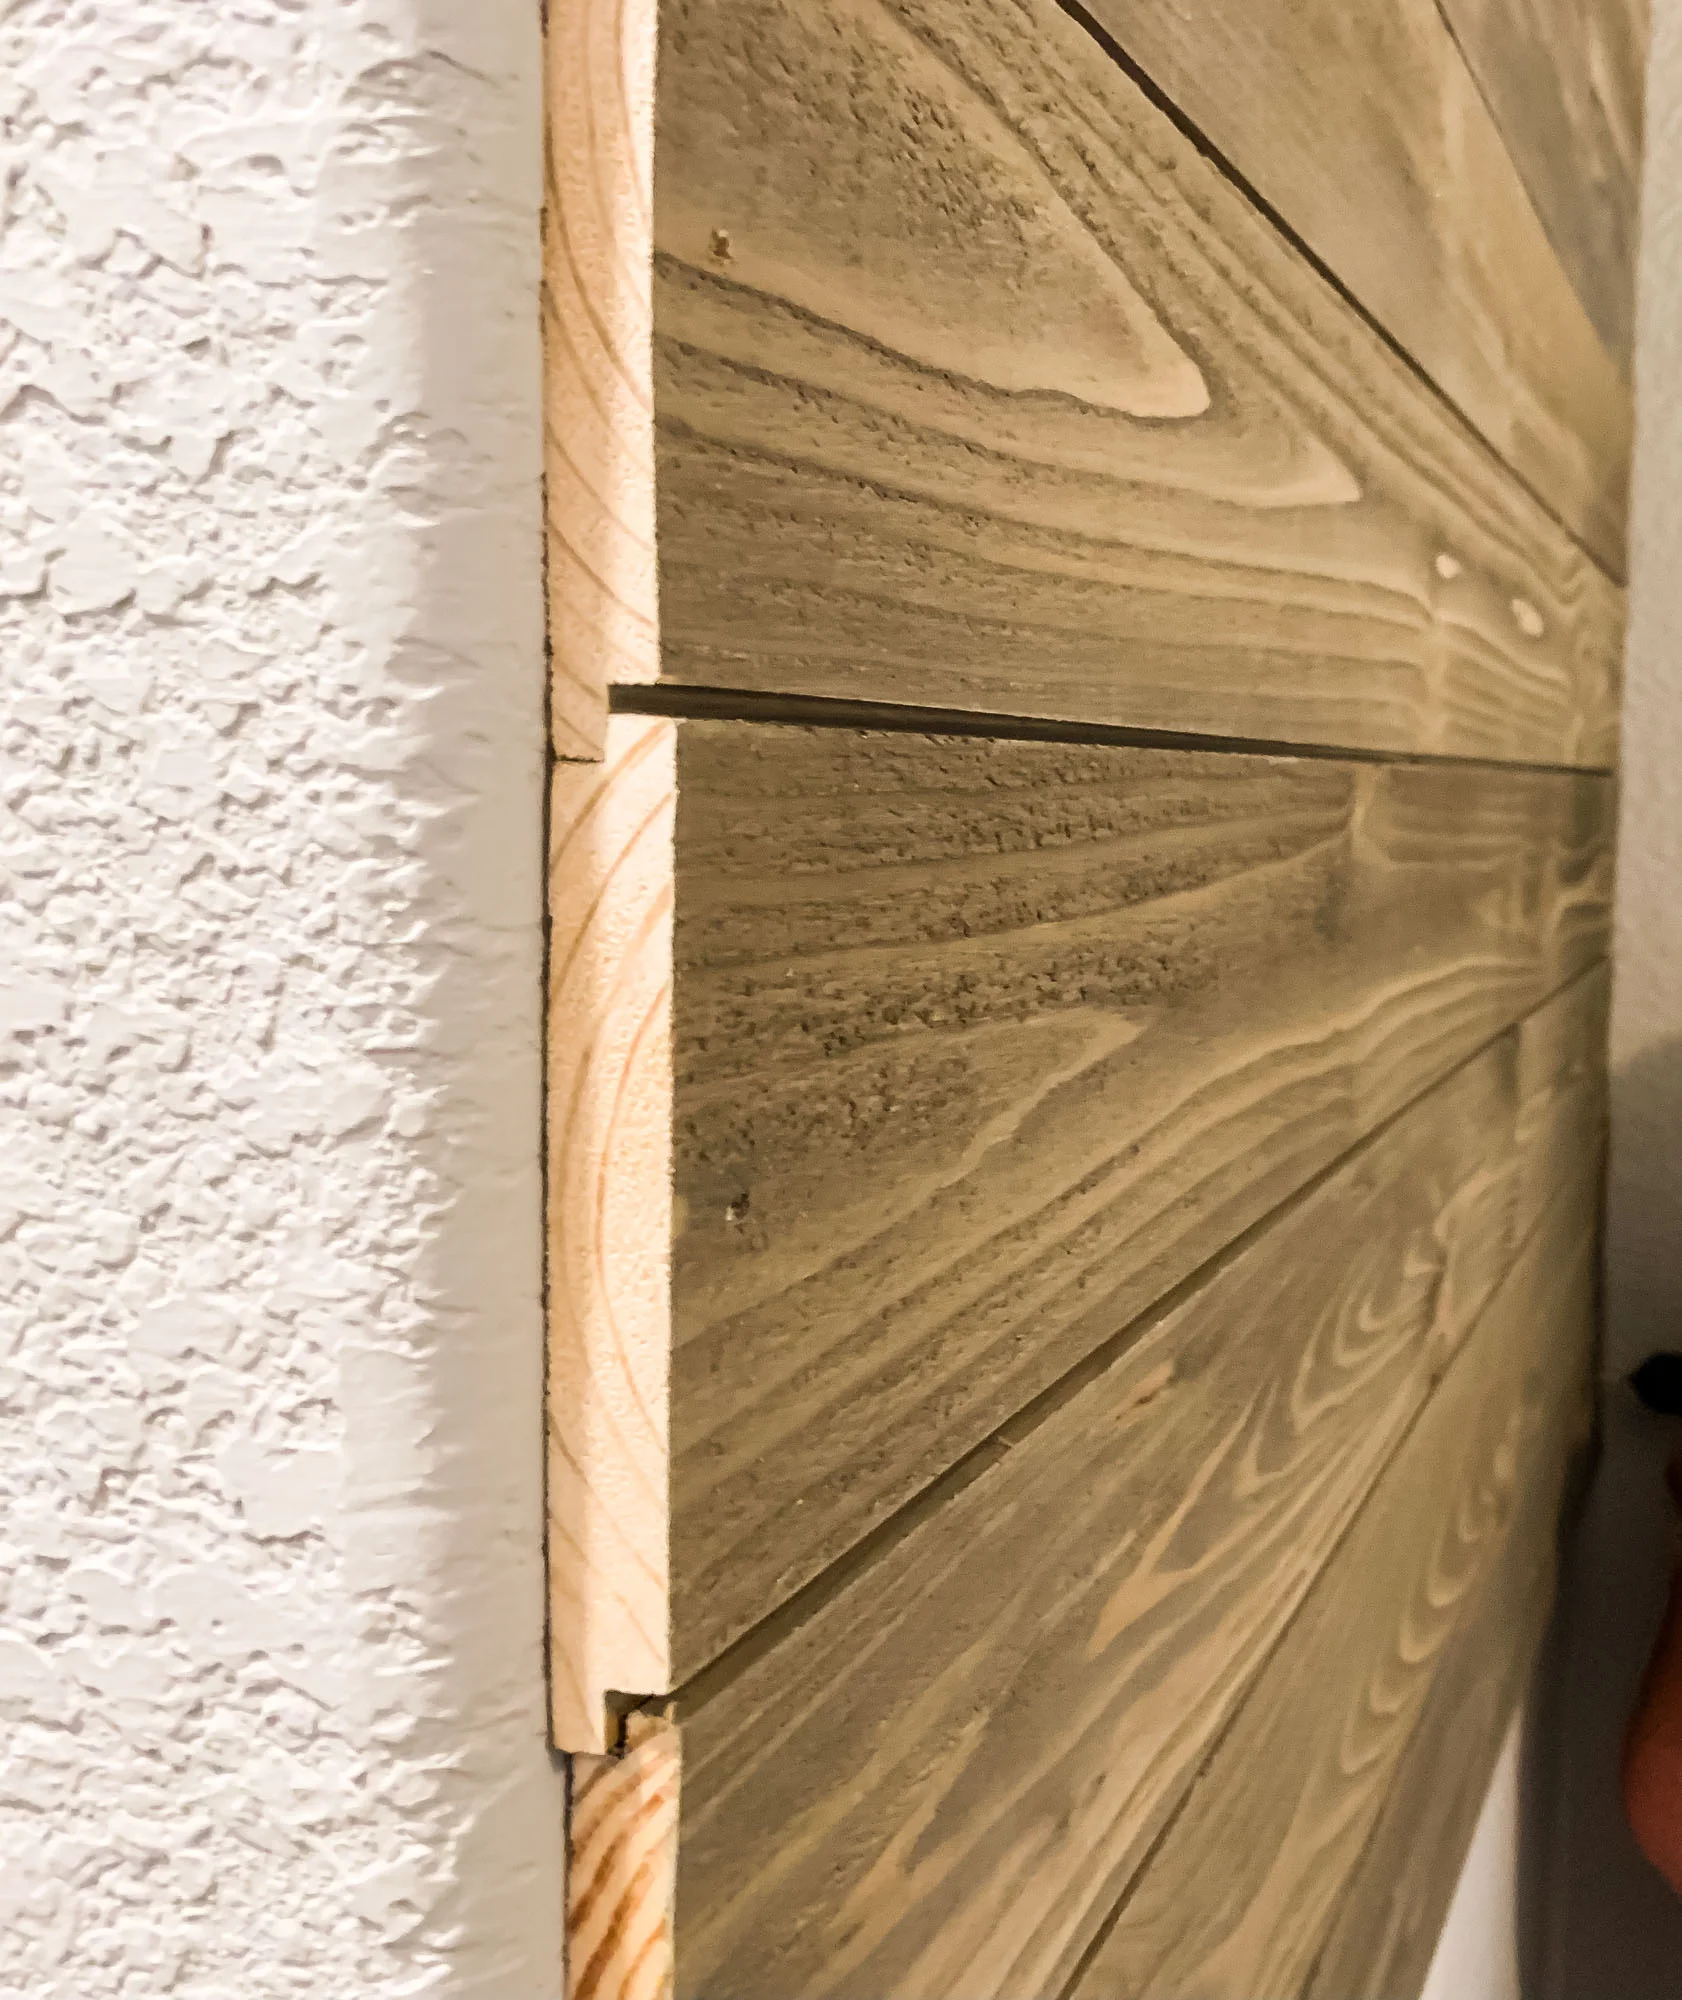
This is what we used because I wanted the convenience of not having to use spacers. Plus, I found some that had a finish that matches our flooring perfectly, so my son’s room would flow with the look of the rest of the house.
We used Rough Sawn Shiplap in Pewter from Lowe’s.
Decide what to do about the trim
The “right way” to do this project is to remove the baseboard before starting the install. Then, after you’ve installed all the way to the floor, you re-install the trim piece.
I did not do this for two reasons: number one, I was scared. I didn’t want to ruin the baseboard by prying it off the wall. I know I could always buy another piece, if I ruined this one, but then I’d have to go BACK to Lowe’s, buy a new piece, cut it, prime it, paint it, install it. That’s just way more than my commitment level.
Secondly, I didn’t wanna.
Calculate how many boards you will need
Take a linear measurement (not a square footage) of the area you’ll cover. (Mine was this: width = 52”. Height = 115”)
Each board is 8’ long (8 x 12” = 96”) and about 5” wide. To calculate how many boards I’d need, I divided the height of my wall by the width of a board (115” / 5” = 23 boards).
Decision: to stagger or not to stagger?
The areas of wall I covered were only 52” across and then 36” across, so I had a decision to make: whether to cut the pieces in various lengths and stagger the joints, in a true shiplap fashion; or to just cut the planks all the same length.
I’m all about the shortcuts in life, so I went with option B.
Measure & Cut Boards
Measure and mark with a pencil where you want to cut each piece.
You can have Lowe’s cut your boards for you, or you can cut them your own damn self, if you’re a power tool-using beast like I am. 😏
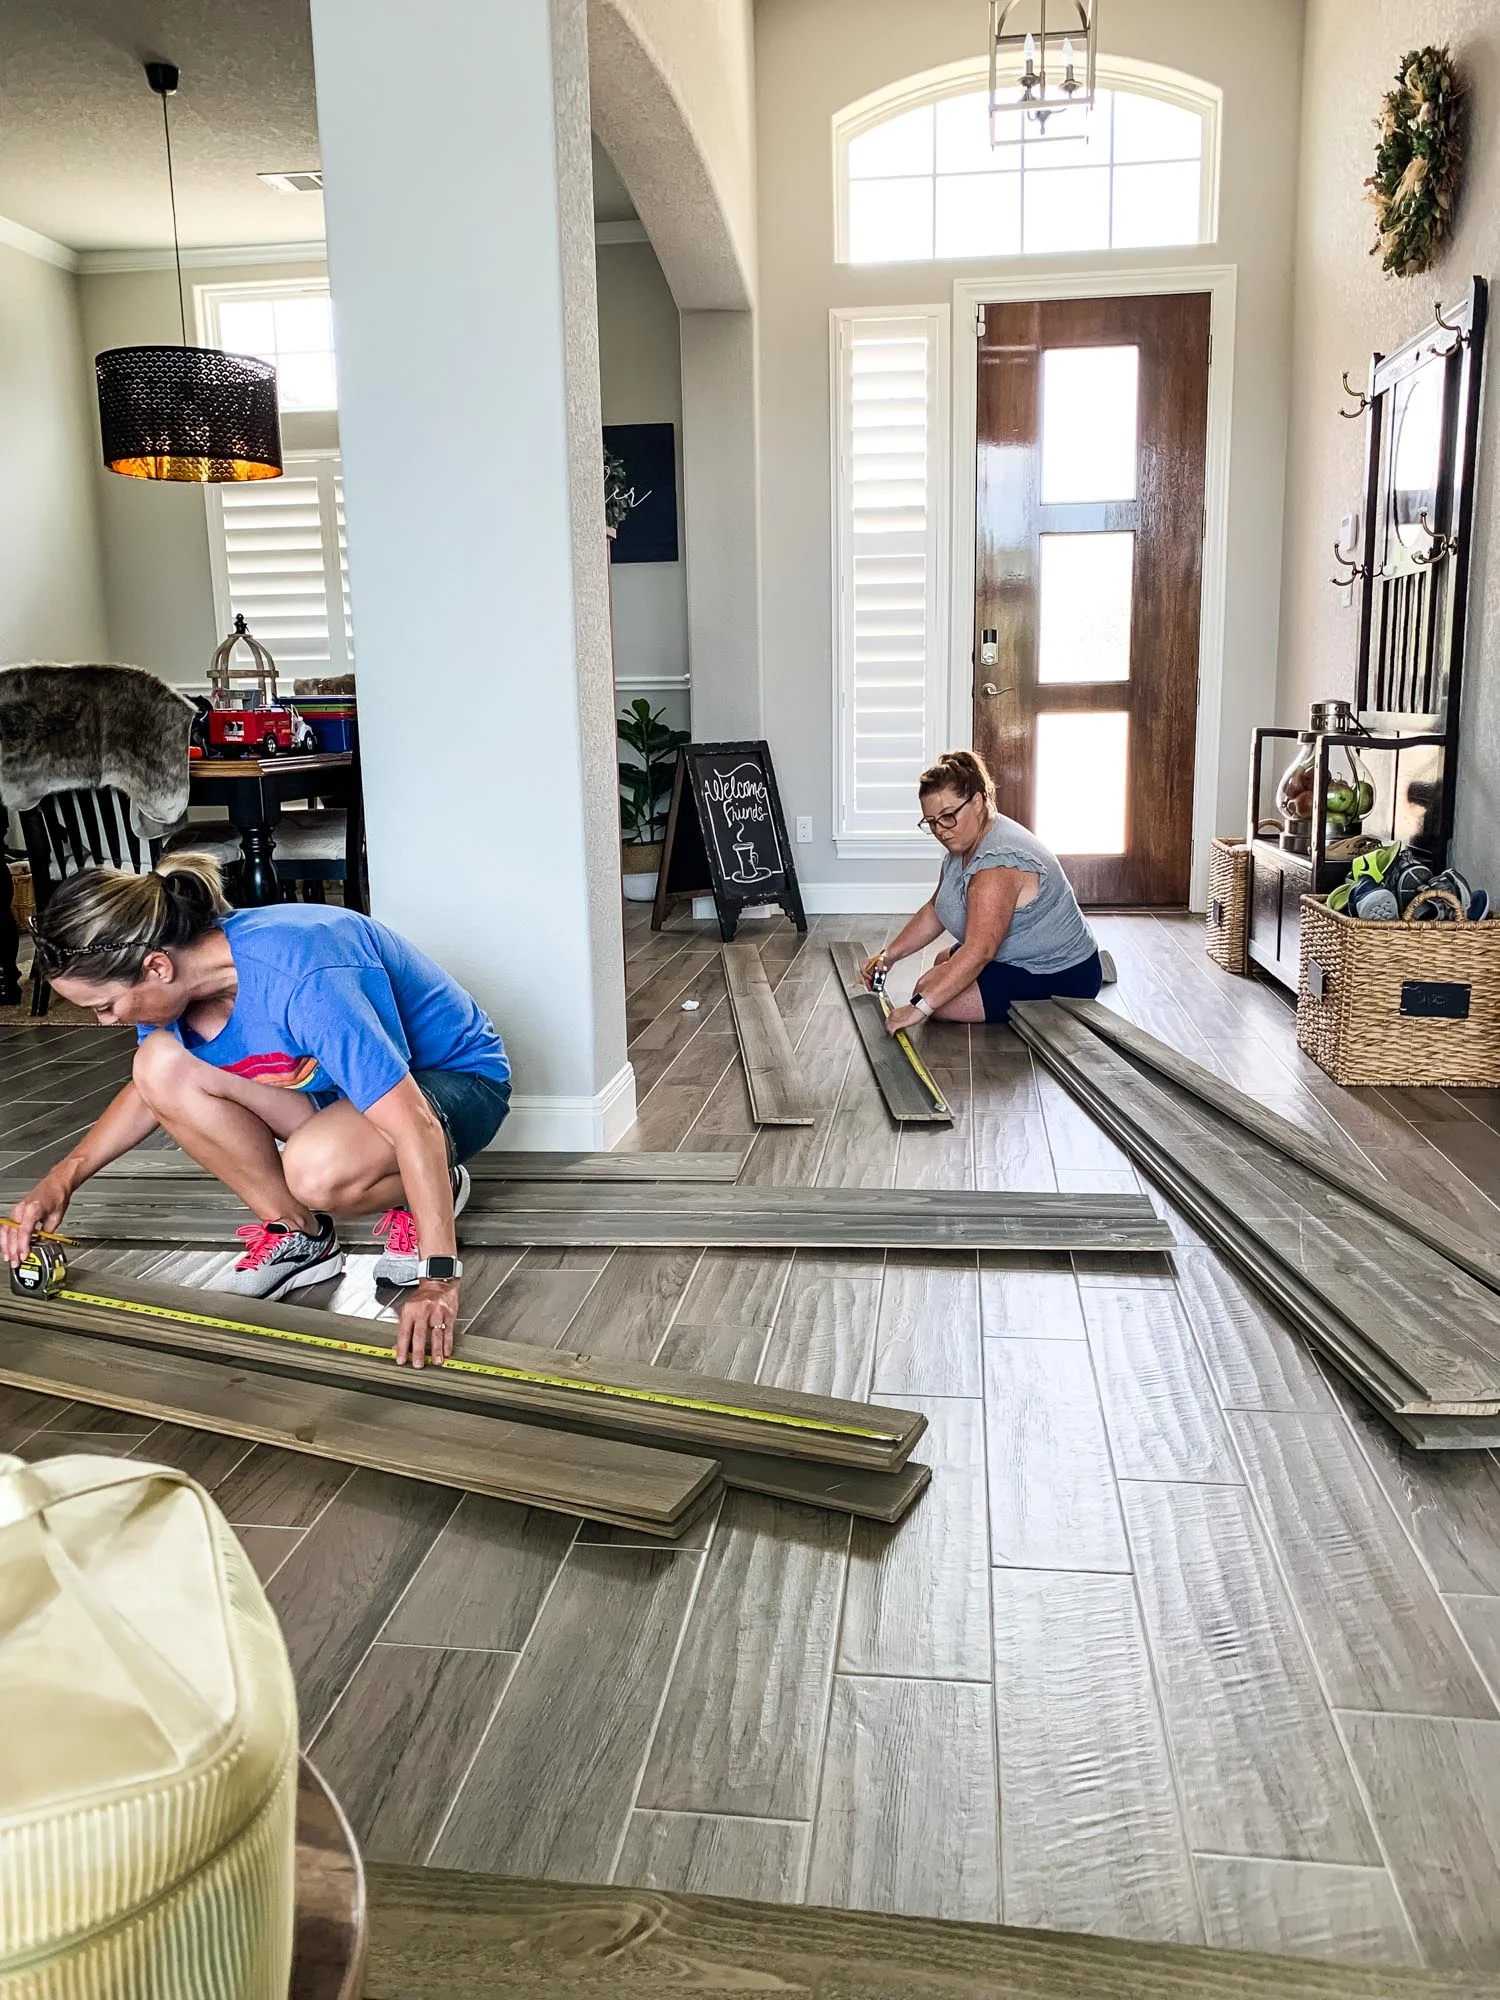
My sis was here for a visit and I put her to work
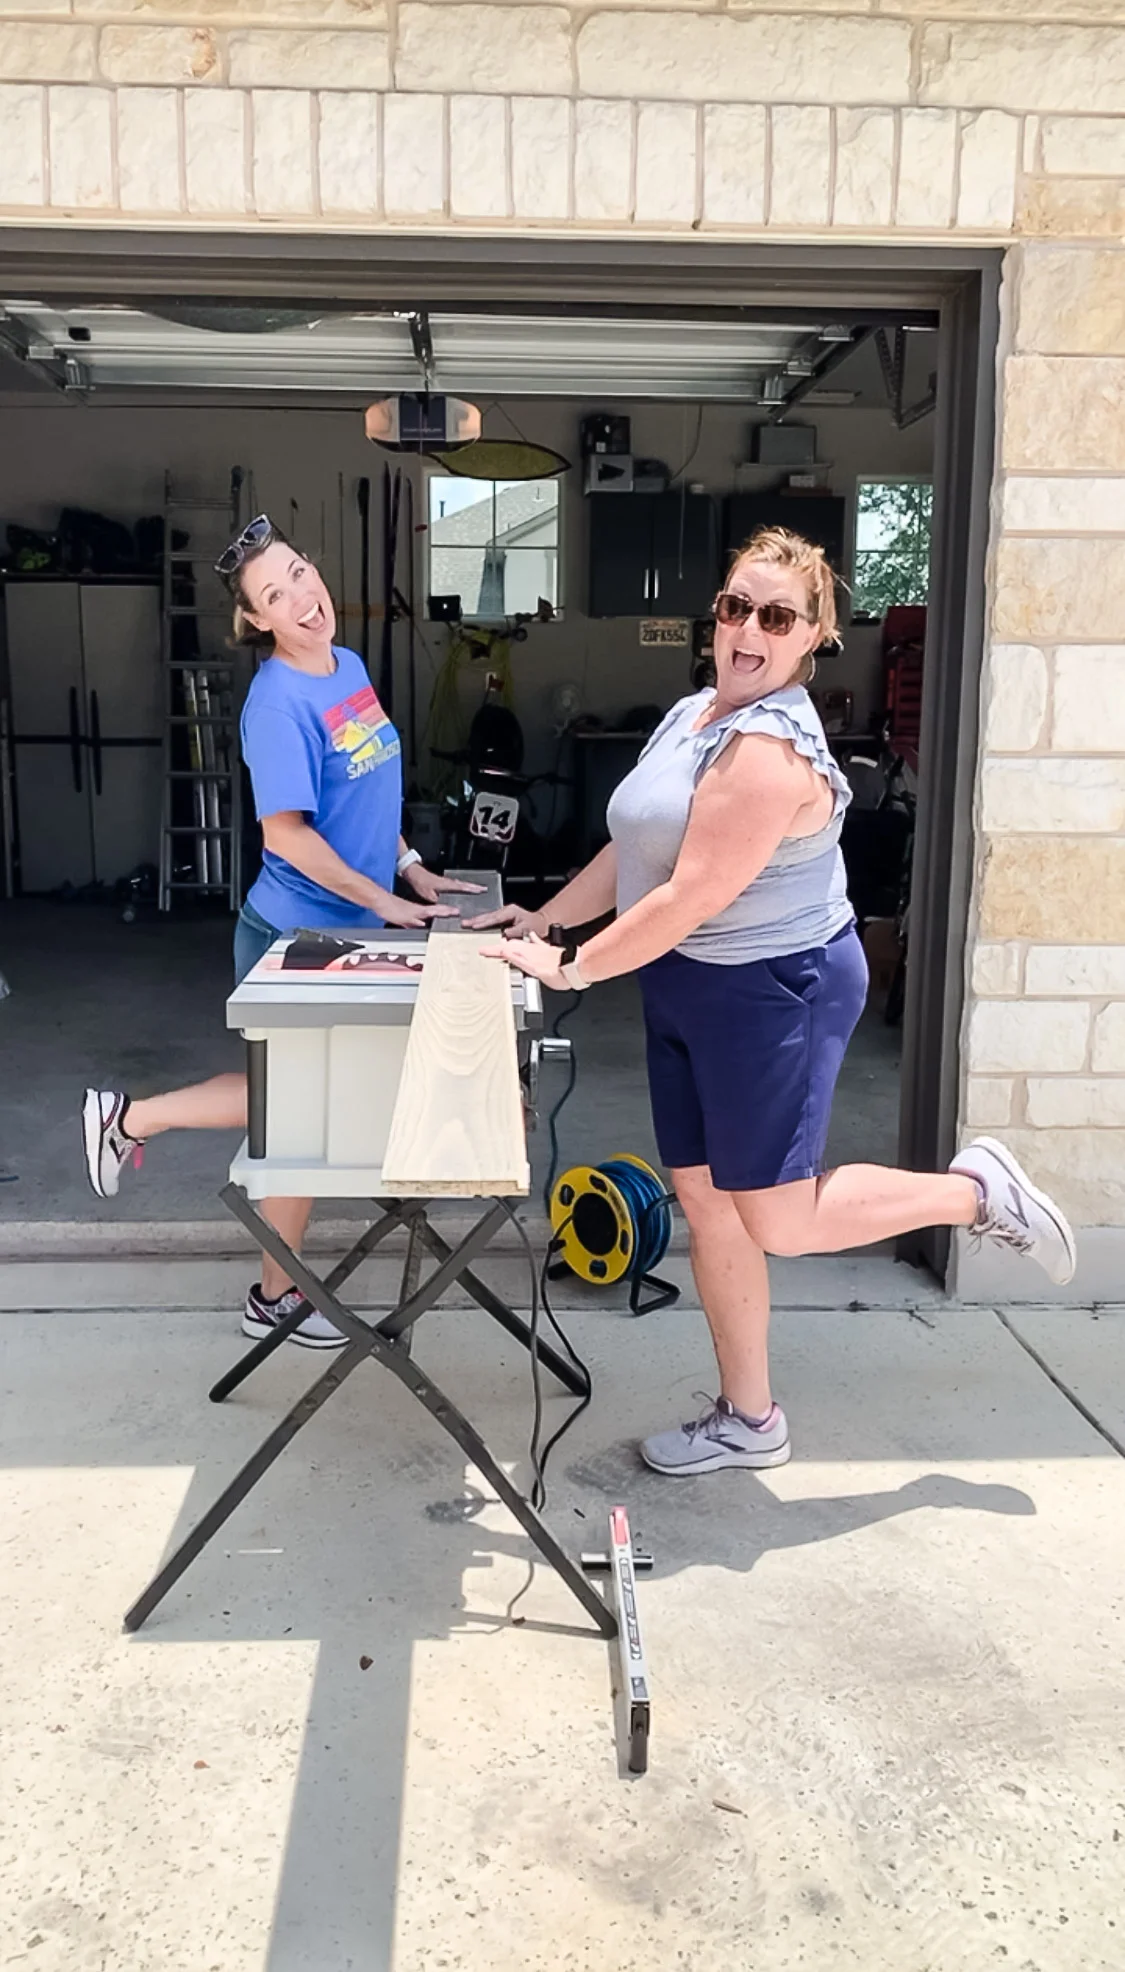
We have no business using power tools when we’re together.
Chalk Line
Find your studs and snap a chalk line. This is where you’ll nail or screw in your boards.
Screw In Boards

Before you screw in the first board, check to make sure your ceiling is level. It’s shocking how un-level your house is, and you don’t realize it until you start doing DIY projects. If your ceiling is off a bit, adjust that first plank slightly so that IT is level, otherwise it’s a catty-wompus mess by the time you’ve reached the bottom.
Screw into the stud (careful not to sink your screw in too deep, but you do want it to go slightly beneath the surface of the wood).
It’s tempting to screw in just one or two screws, but to keep the boards from warping and bowing over time, screw into each stud, all the way across.
Occasionally check to make sure each piece is still level.
Working Around A Light Switch

Cody’s outline and his secret message, alongside the light socket hole I had to work around.

I used a “sawz-all” for the two side cuts, then discovered we had a bandsaw, which would have been the correct tool for all three sides. Never used a bandsaw before, but lookee: still have all 10 fingers!
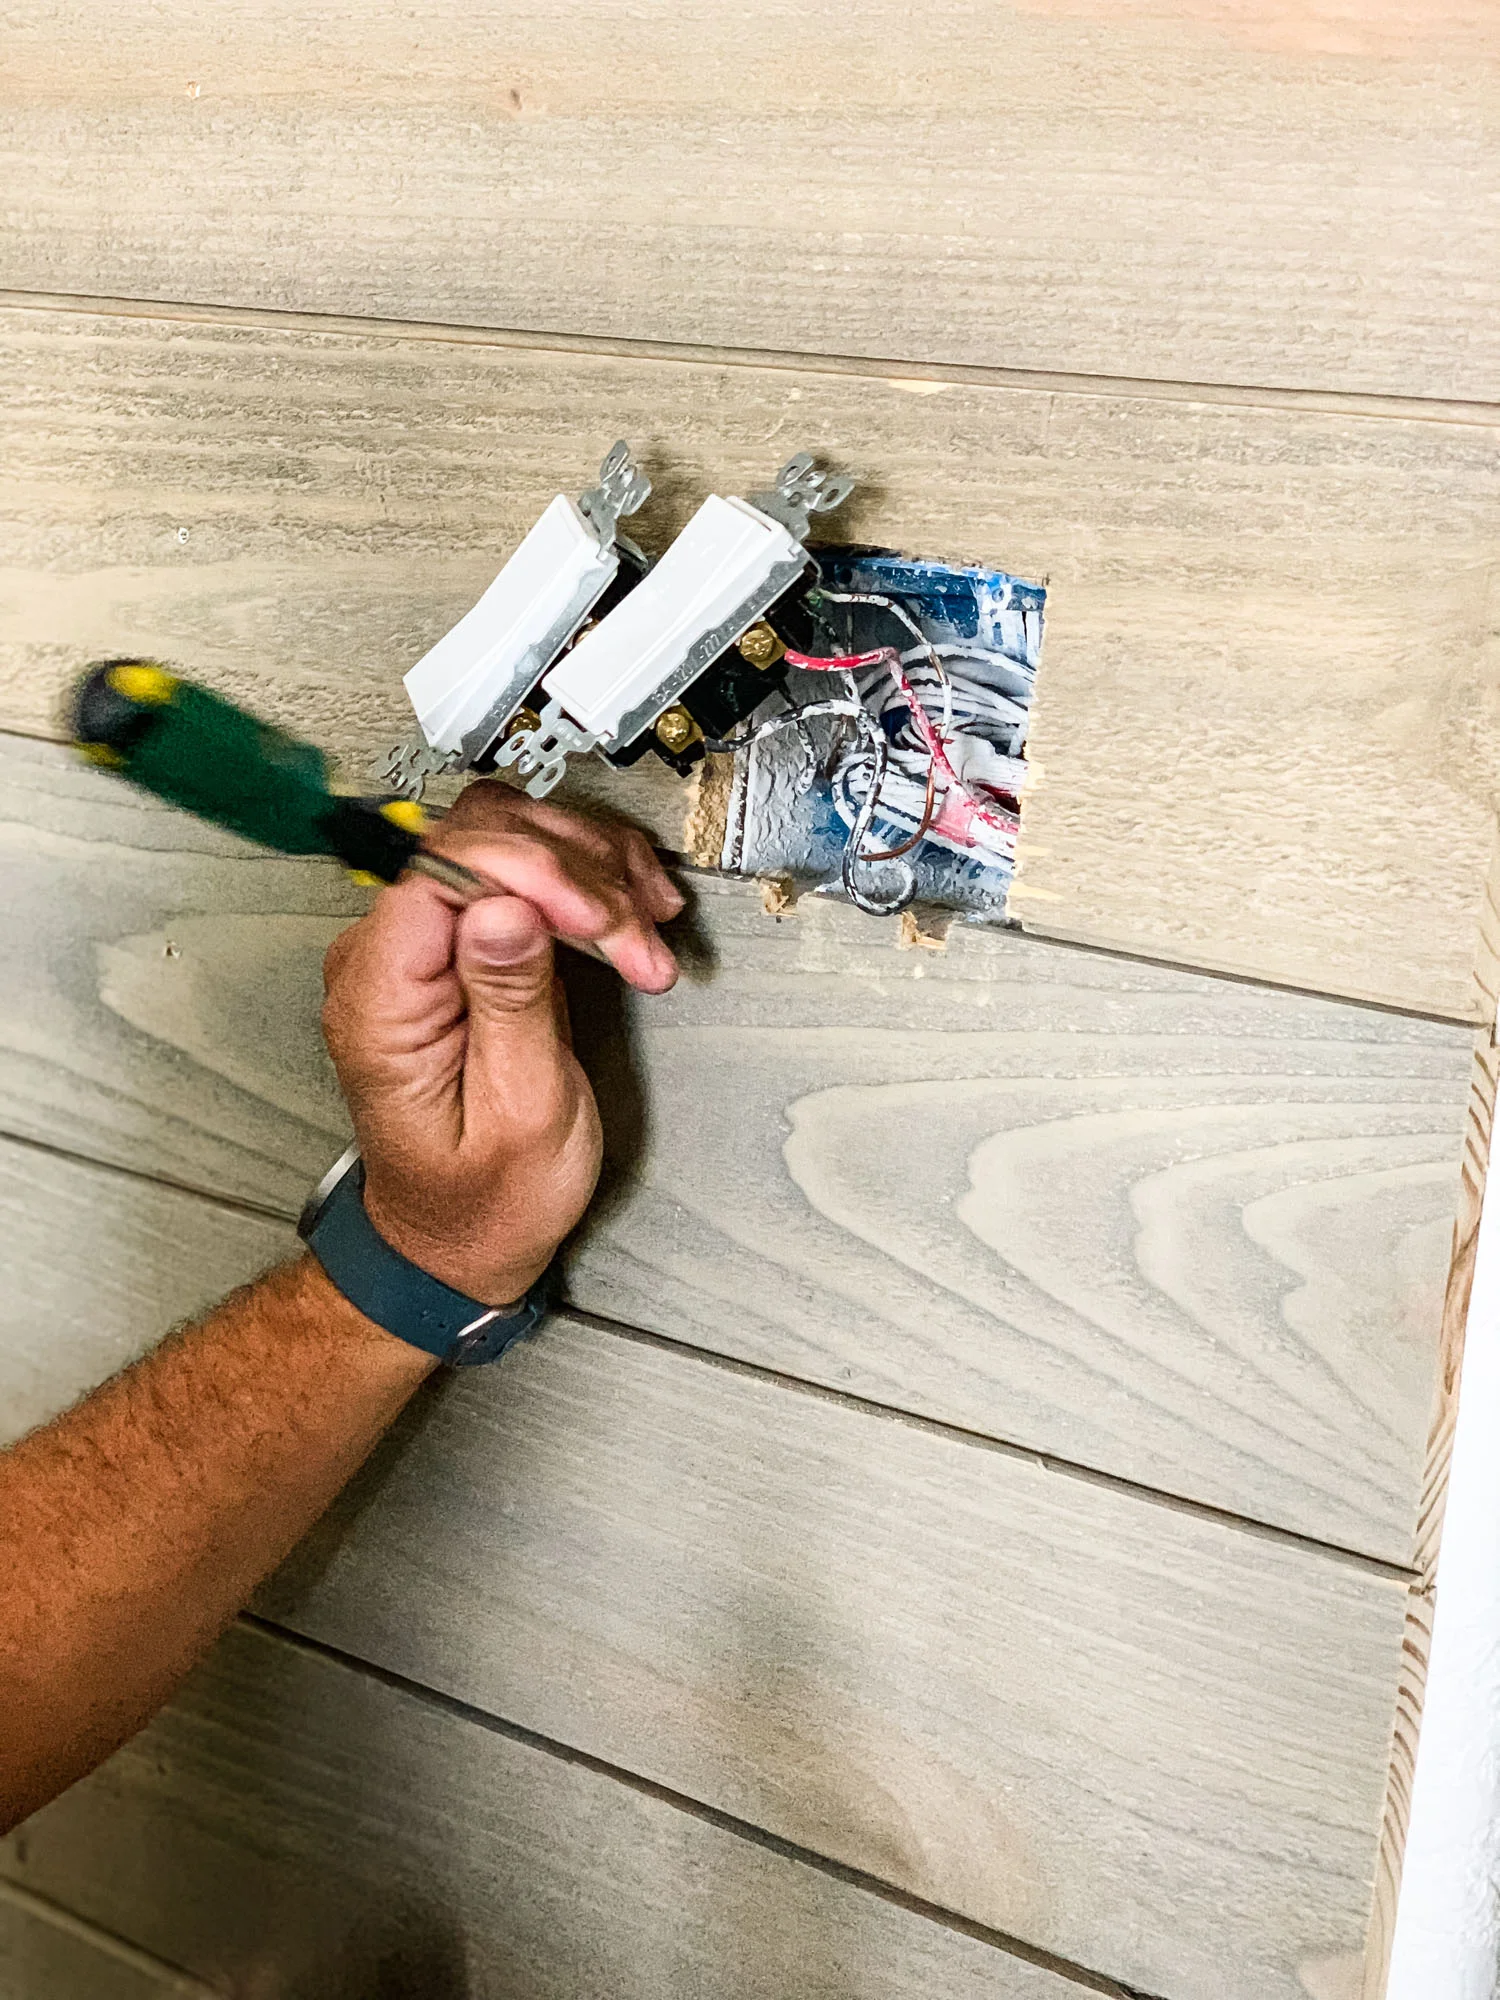
Mark cut out those tiny notches with a little hacksaw, then popped out the pieces by using the screwdriver as a chisel. We are all about McGyvering things up around here.

Voila! I’m pleased with the way it turned out!
Remove the switch-plate and set it aside, along with its screws
Throw the breaker so you have power to that switch (and likely to that entire room) turned off.
Take the board that will need a hole cut and set it up against the hole, so you can see where the hole will need to be cut. Mark it with a pencil onto your shiplap board. Your hole should be cut the same size as the raw hole that’s cut in the drywall.
Use the bandsaw to cut the hole, or - if you don’t have one - take the plank of wood to Lowe’s and have them cut the hole for you.
Screw the board into the stud, making sure the hole in the board lines up with the hole in the drywall around the light switch.
You might have to cut sections out of more than one plank, depending on how the boards fall, in relation to your light switch. Mine worked out to where I only had to cut a square hole out of one board, but then that next board covered up the bottom screw holes that the switch-plate would screw into, so Mark used a small hacksaw to cut notches out of the wood, so we could access the screw holes.
Screw the light switches into the electrical box, then screw on the switch-plate.
Throw the breaker back on so you’ll have light again.
Bottom piece

I had to cut a piece of wood length-wise (called “ripping”) to cover that last two inches of my wall.
Putty holes

The best way to fill these holes is with your finger. Take a tiny blob of Minwax Stainable Wood Filler and shove it into each hole, making sure it’s flush with the top of the hole.
Wipe away excess filler before it dries. You might need a wet cloth to do this.
IMPORTANT: Do not fill the holes then stop to go eat dinner, planning to come back afterwards to remove excess material, because you run the risk of forgetting to circle back until the next day, when you will find that the filler has dried and you are thusly screwed. See Exhibit A.
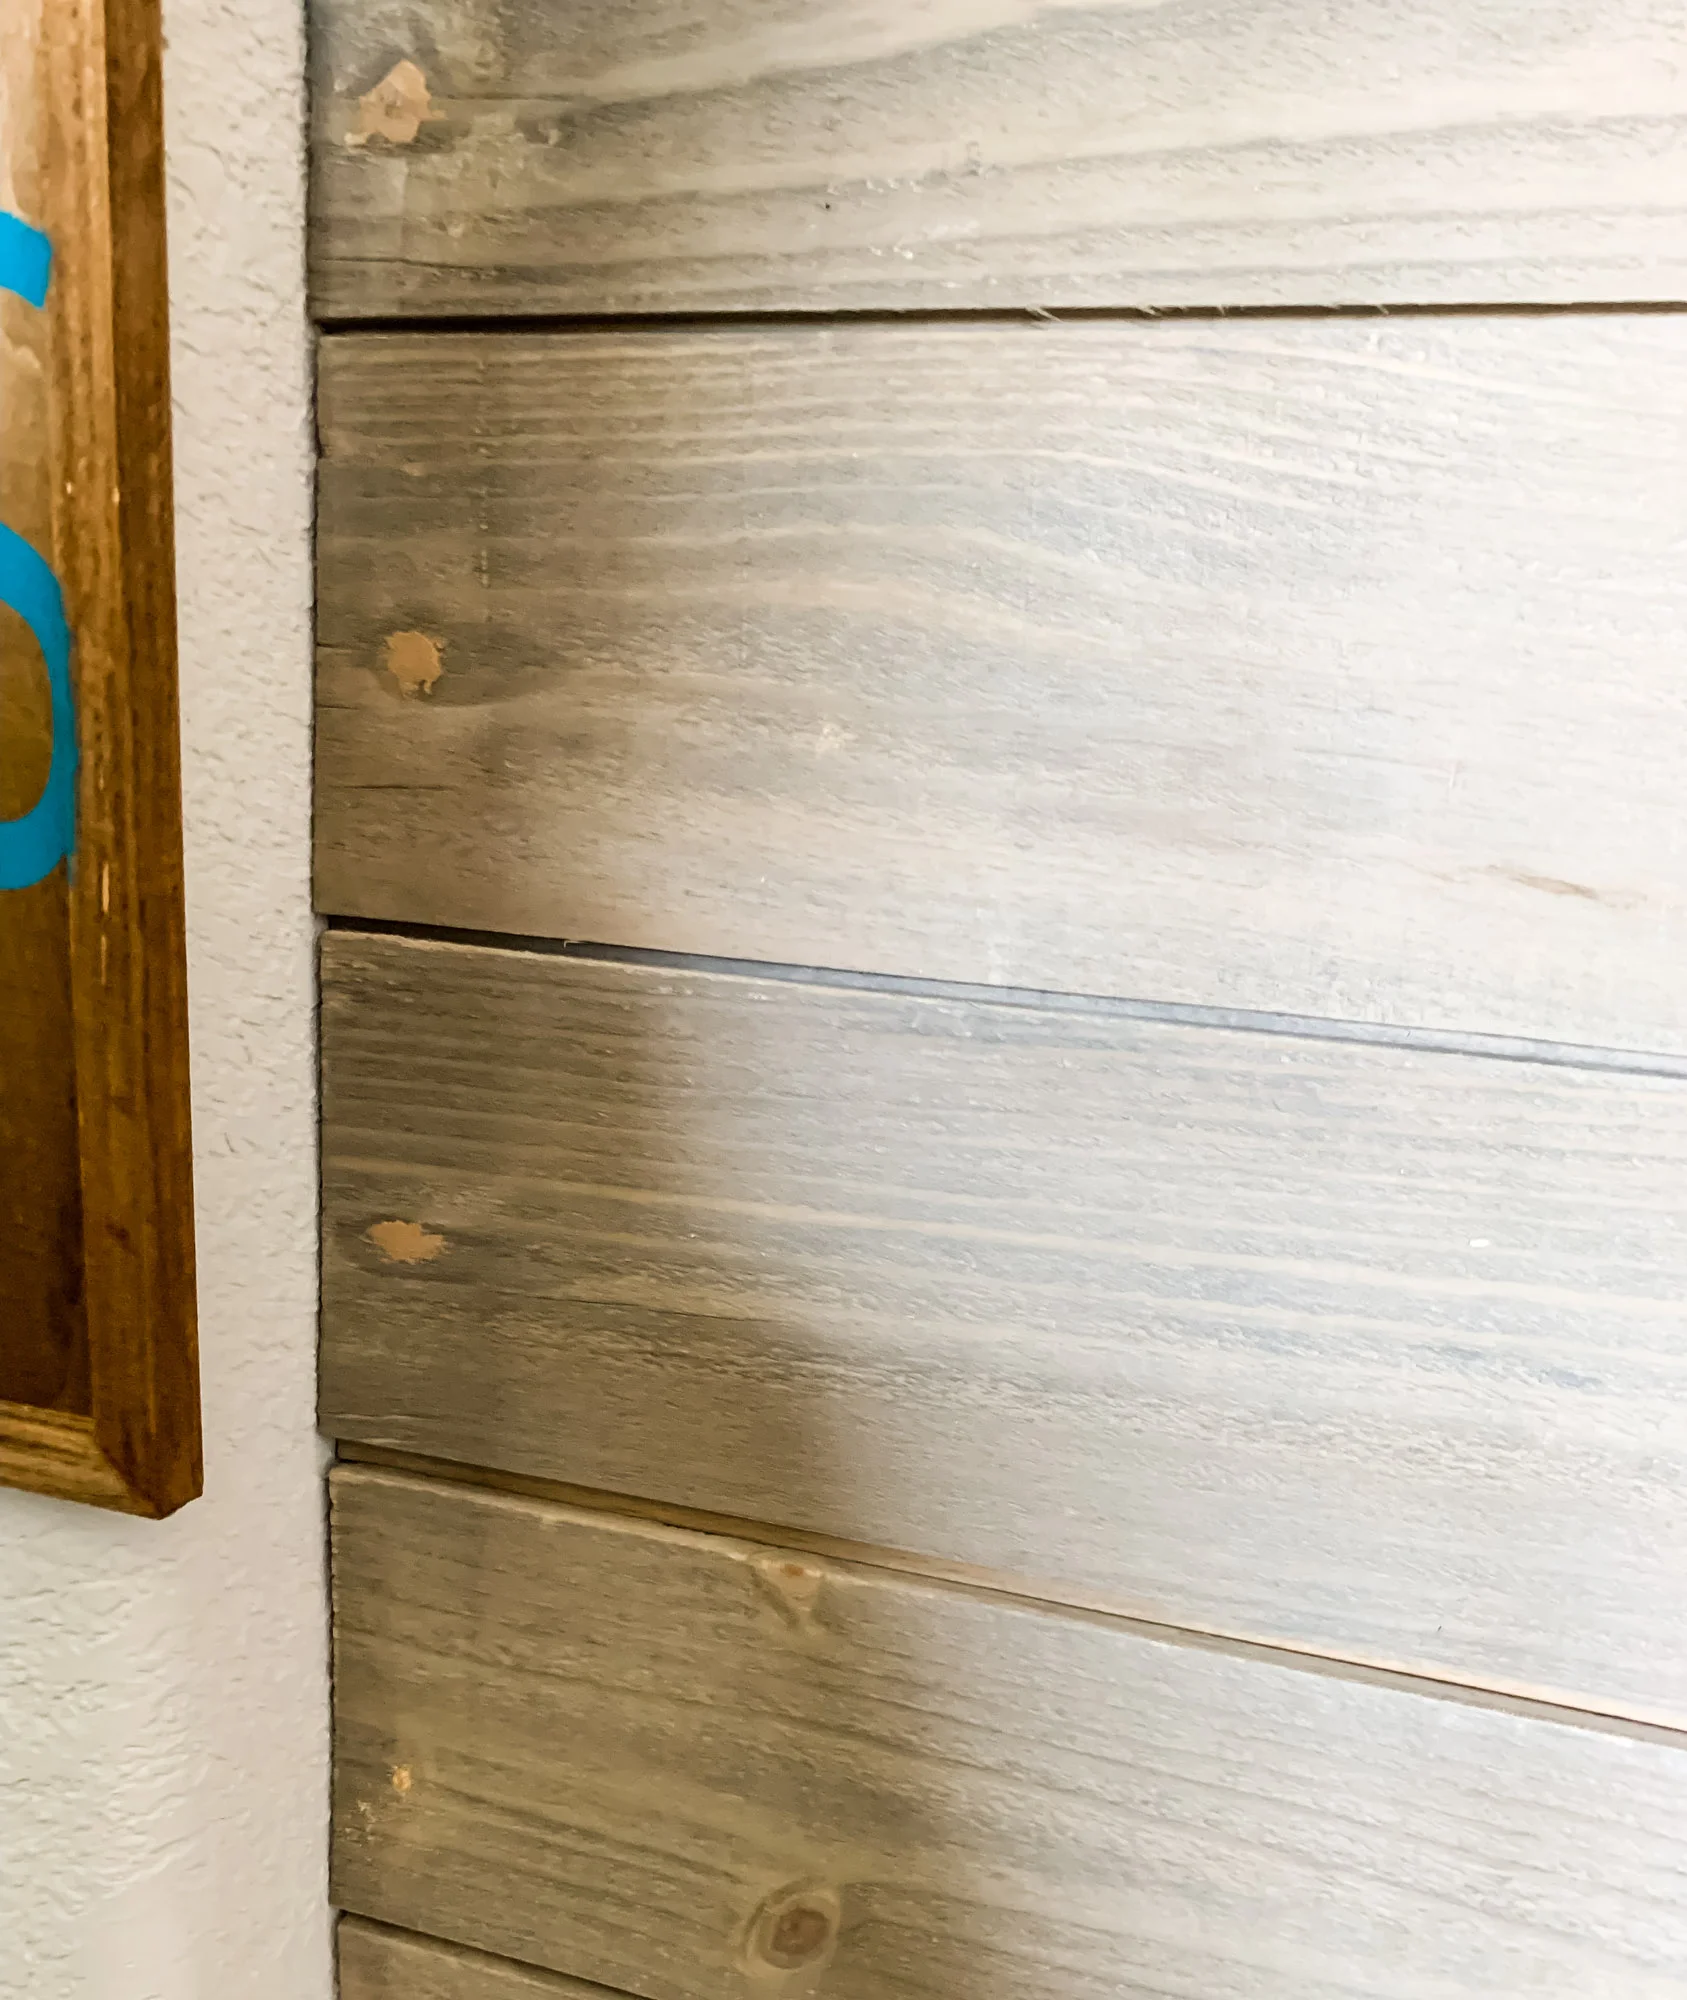
Exhibit A
ALSO IMPORTANT: I cannot recommend enough the importance of going with a rustic look when you are a DIY project do-er who has focus issues and extremely low quality standards.
This is why my entire home is cloaked in a rustic theme.
Stain ends and screw holes
Protect the wall against the edges of your shiplap with painters tape, then, using a small craft paintbrush, apply stain to the raw ends of the shiplap.
After the putty has dried in the screw holes, feather a tiny amount of stain over them
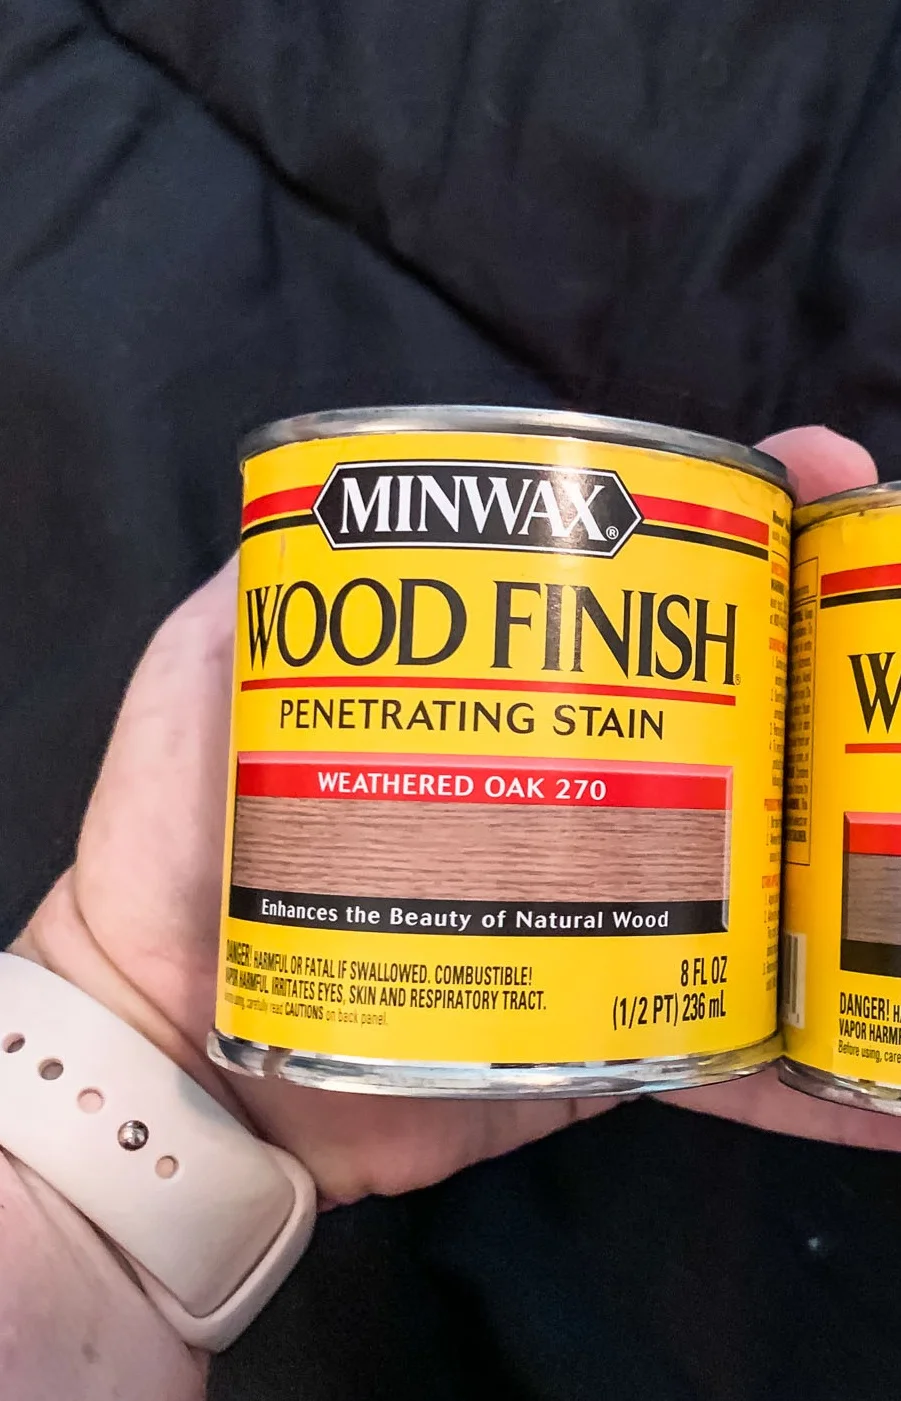
For a perfect match with the Pewter shadow gap, use Minwax Wood Finish Penetrating Stain in Weathered Oak 270.
Stain & apply trim piece
If you’re fancier than me, you may want to install a ¼”-round trim piece to give a more finished look. If you do this, measure, cut, and stain the trim piece before installing.
This really is such an easy project, and if your planks aren’t too long, you can even do it yourself. My sis helped me with the first section of wall that I did, which turned out perfectly.
I did the second section by myself, and while it turned out about 90% as successfully as the first section, it’s got its flaws.
I’m not in love with how “rustic” the measurements are on the section I did myself. I was simultaneously painting a nightstand in the garage where I was cutting these boards, and after I got them installed, I can see that I was high during the cutting portion of the project.
Sconce Lights
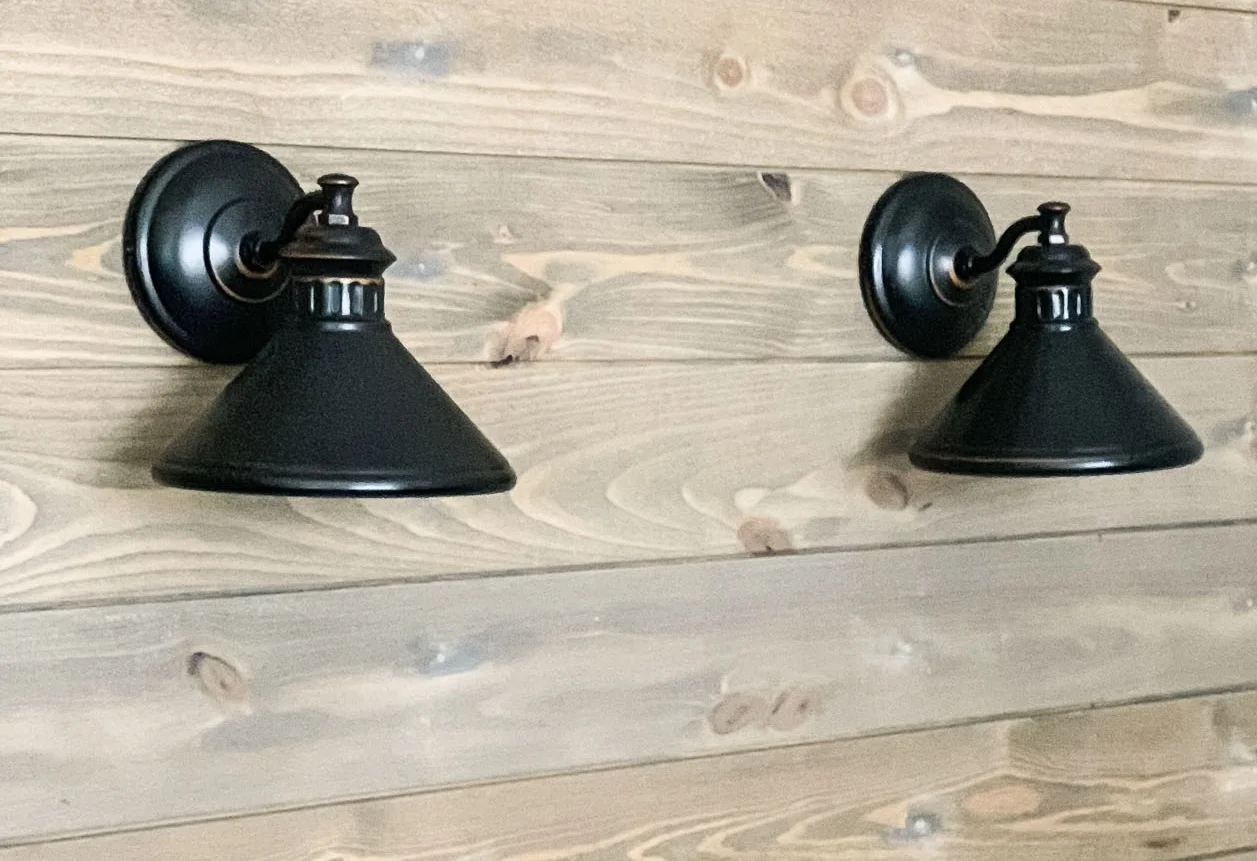
The piece de resistance is the farmhouse style sconce lights, which are remote controlled and are installed without having to run electricity. 🤩
You can find that tutorial right here.